Frequently Asked Questions
Find detailed answers to commonly asked questions about the X Node cloud platform.
Billing & Payments
Monthly Servers:
First Month:
We offer a 30-day free trial. The first invoice is sent out the month after the free trial expires. For example, if you start the free trial on March 15th, it will expire on April 15th and your first invoice will be emailed to you in May. The invoice in May will include a prorated charge for April 15th through the end of the month in addition to the entire month of May.
Month 2+:
You will be billed in the current month for the full amount of the server. If you create a server or upgrade your current server after the 1st of the month, you will receive a prorated bill for those additions the following month. If you cancel a server after the 1st of the month, you will still be charged for the full month’s services.
Hourly Servers:
First Month:
We offer a 30-day free trial. The first invoice is sent out the month after the free trial expires. For example, if you start the free trial on March 15th, it will expire on April 15th and your first invoice will be emailed to you in May. The invoice in May will include a prorated charge for April 15th through the end of the month.
Month 2+:
Hourly servers are post-billed. Invoices are generated each month for the previous month’s usage.
We offer two methods of payment:
- Credit card: We accept all types of credit/debit cards with a cardholder’s name including virtual, prepaid, and electronic cards.
- Deposit: We accept a prepaid payment in the form of a deposit which can be made by credit card or PayPal.
Some information can be changed, including but not limited to your email, name, address, and company name.
We are happy to make this change for you. Please email all requests for changes to support@xnode.com.
Your account may be suspended for one of two reasons:
- Your credit card payment failed. If this happens, please update your account with new credit card details.
- Not enough deposited funds. If this happens, please make an additional deposit as instructed by our system.
- We suspect fraudulent activity on your account.
As a quick verification step, we kindly request a brief 2-second video of you holding your ID, which will allow us to confirm that the credit card used to create the account belongs to you.
Please note that we will never ask for your full credit card number or CVV when requesting a copy of your card.
We only require the first and last four digits, your name, and the expiration date.
Upon signing up, a charge of $1 to $2 is initiated to verify the validity of your credit card. This charge will be voided within days of signing up.
The purpose is to confirm the authenticity of your payment method.
The 30-day free trial includes 1 server with a configuration worth up to $100 and 1000 GB of traffic.
If you exceed the above limitations, the system prorates the cost of the overage and automatically charges your credit card.
The payment creates a credit on the account that will be applied to your future invoice.
If you were asked to make a deposit before launching your server, it will be applied towards your future invoice or can be refunded upon request if you terminate your server within the 30-day trial.
The billing cycle starts on the 1st of the month. If you cancel a monthly server after the 1st of the month, you will still be charged for the full month’s services.
Therefore, it’s important to always terminate a server before the 1st of the month.
If you have an hourly server, once it is terminated you will no longer be charged for the usage of that server.
However, since hourly servers are post-billed, you will receive the invoice the month after you terminate the server for your usage during the prior month.
For monthly servers, we require a minimum balance to cover the remaining days of the current month in addition to the entire upcoming month.
For Hourly servers we require a minimum balance equivalent to at least 7 days’ worth of service, based on your daily rate.
To ensure uninterrupted service, we require that you make a deposit and maintain a minimum balance in your account.
The deposit will be applied towards your future invoice or can be refunded upon request if you terminate your server within the 30-day trial.
Our unmetered hosting service offers a 5000Mb package, which is the most popular choice among our clients. With unmetered hosting, there is no speed limit, and you can enjoy unlimited data traffic up to 5000gb per month. If you happen to exceed this limit, you will only be charged for the additional data used.
It’s worth noting that approximately 90% of our clients don’t exceed 2000gb per month, ensuring they stay well within the included data allowance. Additionally, when your incoming traffic exceeds 33% of the overall traffic, you’ll be billed for the entire traffic. This 33% threshold is calculated based on a ratio of 2 times Transmit compared to Receive (a ratio of 2/1).
X Node offers state-of-the-art Intel Xeon Platinum/Ice Lake, 2.6GHz+ processors, and lets you choose the type of CPU that will fit your unique cloud server requirements.
We offer 4 server CPU types from which to choose:
Type A – Availability: Server CPUs are assigned to a non-dedicated physical CPU thread with no resources guaranteed.
Server configuration is available from 1 vCPU up to 32 vCPUs per server and from 1GB RAM up to 128GB RAM per server. This is ideal for a variety of general-purpose applications like micro-services, small to medium applications, development environments, container services, or any server use that does not require guaranteed CPU resources.
Pricing starts at $0.00054/hour or $4/month.
Type B – General Purpose: Server CPUs are assigned to a dedicated physical CPU Thread with reserved resources guaranteed.
Server configuration is available from 1 vCPU up to 128 vCPUs per server and from 1GB RAM up to 512GB RAM per server. This is typically recommended for all general-purpose scenarios of production-use such as application servers, web servers, database servers, container nodes, storage servers, HPC, etc.
Pricing starts at $0.0123/hour or $9/month.
Type T – Burstable: Server CPUs are assigned to a dedicated physical CPU thread with reserved resources guaranteed.
Exceeding an average CPU usage of 10% will be extra charged for CPU usage consumption.
Server configuration is available from 1 vCPU up to 128 vCPUs per server and from 1GB RAM up to 512GB RAM per server. This CPU type is recommended for general-purpose scenarios of production-use such as application servers, remote desktop servers, web servers, storage servers, etc. AND when CPU usage requirements are burstable during a small period of the time used.
Pricing starts at $0.0123/hour + $0.041/hour/CPU (Charged only if exceeding an average of 10% of CPU Usage)
Calculation example:
Server configuration of 8 vCPUs, 8GB RAM, and 50GB of storage will cost $0.0931/hour ($68 for 730 hours) when powered on and $0.0102/hour ($7.50 for 730 hours) when powered off.
If the server is powered on for the whole month (730 hours), and the average CPU Usage of 730 hours is 7%, the server will cost $0.0931 x 730 hours = $67.96.
If the server is powered on for the whole month (730 hours), and the average CPU Usage of 730 hours is 20%, the server will cost $0.0931 x 730 hours + $0.041 x 730 hours x 8 vCPUs x 0.10 percent = $67.963 + $23.944 = $91.91.
Type D – Dedicated: Server CPUs are assigned to a dedicated physical CPU Core (2 threads) with reserved resources guaranteed.
Server configuration is available from 1 vCPU up to 32 vCPUs per server and from 1GB RAM up to 512GB RAM per server.
This can be used for all general-purpose scenarios of production-use such as application servers, web servers, database servers, container nodes, storage servers, HPC, etc.
Pricing starts at as low as $0.026/hour or $19/month.
Our system is not designed for individual billing dates for each customer.
Once invoices are generated and sent out via email, the payment is processed within 2 business days.
You can update your credit card by logging into the Management Console->Billing->Billing Profile.
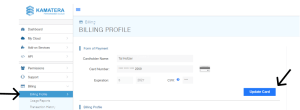
If you have a balance, please be advised that the system will try and process the charge immediately or during the next business day. If the charge fails, your account will be suspended. There may be an automatic charge of up to $25.00. This charge will be credited to your future payments.
Account Management
To make a deposit, follow these steps:
Log into your X Node console
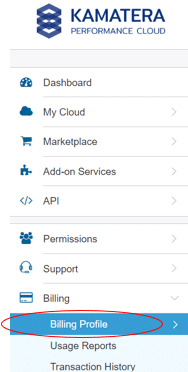
In the left sidebar, click Billing >> Billing Profile
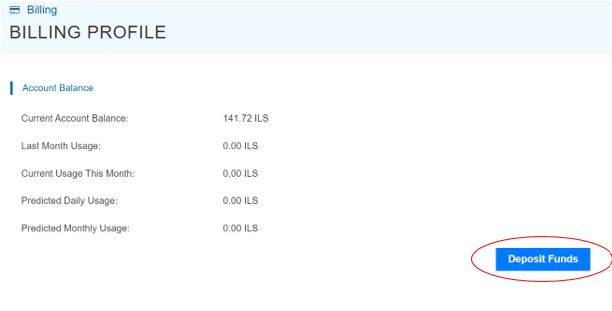
To the right of the screen, you will see your Billing Profile with details about your current account balance. Below, on the far right you will see a blue button labeled “Deposit Funds”
Once you click on the button, a window will pop up presenting you with options for your method of payment as well as the amount. The deposit can be made via credit card or PayPal:
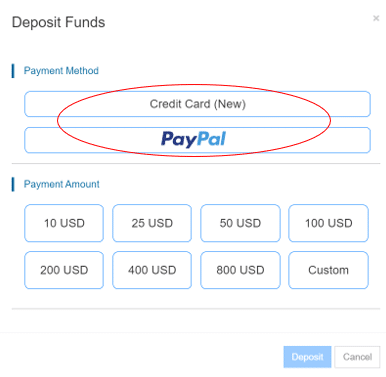
If you select credit card as the payment method, you will be asked to enter your card information. If you choose PayPal, you will be redirected to their website to login into your account, and confirm the payment.
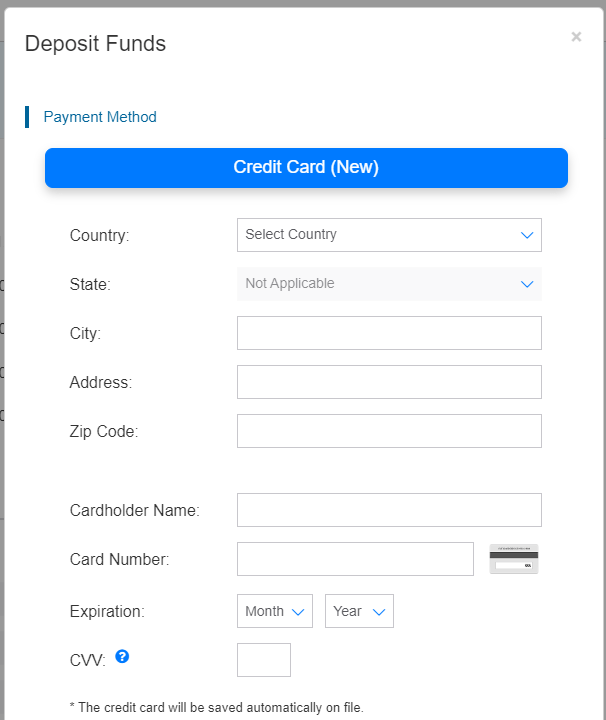
Once you select your payment method, you can choose the amount you wish to deposit. You may deposit any amount you wish, though we require a minimum of $10.
After you choose your deposit amount, the blue “Deposit” button will be highlighted:
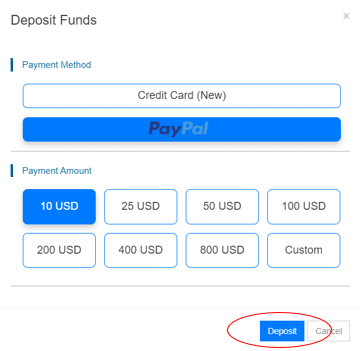
Press the deposit button.
Once the system completes processing your payment, you will be ready to go and your account balance will reflect your new deposit.
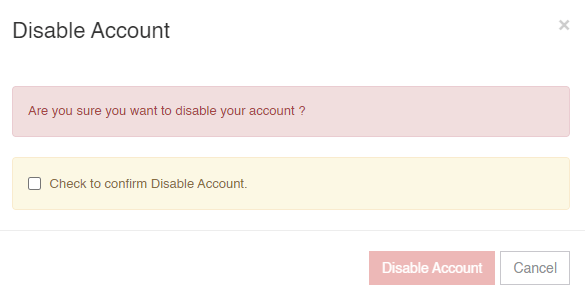
You can disable your Kamatera cloud account from within the console if the account has no active servers and no debt.
- Terminate all your services.
- Go to User Profile page and scroll down until you see “Account Status”.

- Click “Disable My Account.“

- Confirm and click “Disable account.“
It is important for you to know that Kamatera cloud platform is fully compliant with GDPR & Data Processing.
Once an account is in Disabled Status, the account will no longer be valid/active. However, as per GDPR & Data Processing Agreement (DPA) requirements, a copy of your account will be kept on record for financial and tax regulatory purposes. For more information about Deletion/Return of Processed Personal Data, please review the GDPR & DPA guidelines here.
Creating Groups & Assigning Group Permissions
- Go to: https://console.kamatera.com/login .
- Login with your email and password.
- From the administrative panel on the left, navigate to “Permissions” > “Groups”.
- Click “Create New Group“.
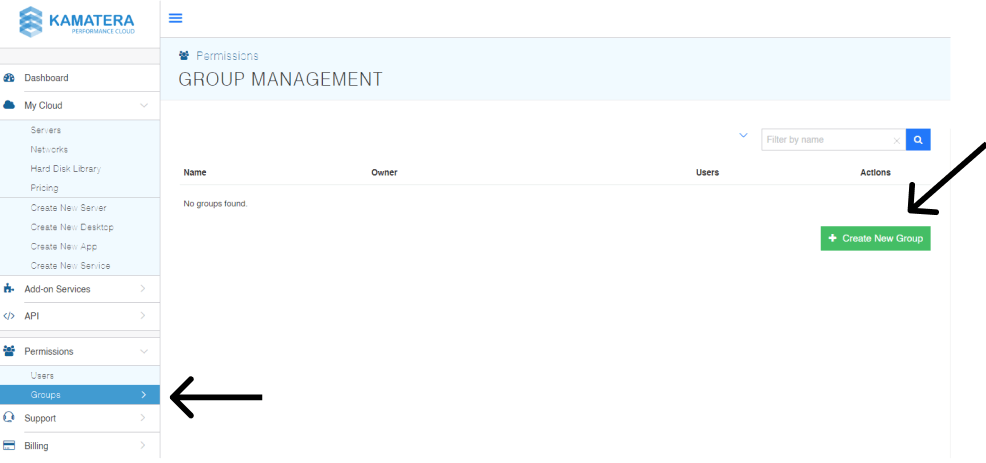
- Choose a descriptive name for the group, then select “Create Group”.
Adding/Removing Users from a Group
- Go to the “Groups” tab of the platform, which can be find under “Permissions” in the left panel.
- Click the “Open” button on the group you want to add users to.
- Click “Add User”.

- To remove a user, click “actions” under that user’s name when you have the group selected.
Choose the option to remove.
Assigning a Group to a Server
- Go to the “Servers” tab of the platform, which can be find under “My Cloud” in the left panel.
- Click on the “Actions” button of your desired server and select “Permissions”.
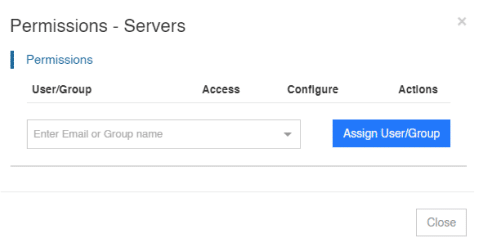
- Type in the name of the group you’d like to assign to that server.
- Select only “Access” permissions for basic viewing and or both “Access” and “Configuration” permissions for full control.
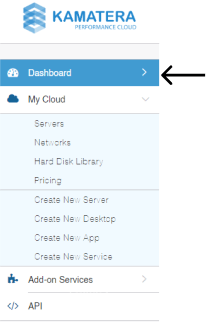
1.From the administrative panel on the left side of the screen select “Dashboard”.
2.On the top right section of the platform select “Add Module”.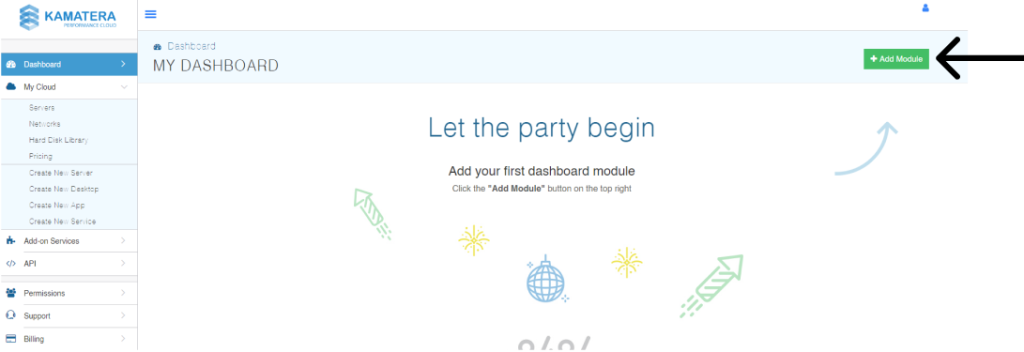
3.An Add Dashboard Module window will appear in the middle of the screen.
Click on the dropdown menu and select the Module you want to add the dashboard, define filters and click “Add Module“.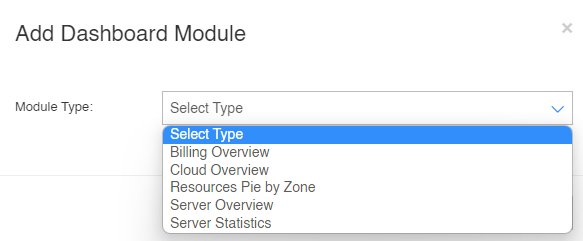
1.Go to: https://console.kamatera.com/login .
2.Login with your email and password.
3.From the administrative panel on the left, navigate to “Permissions” > “Users”.
4.Click “Add New User”.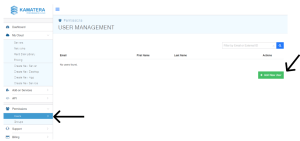
5.Insert user details.
Email address is needed for verification and password reset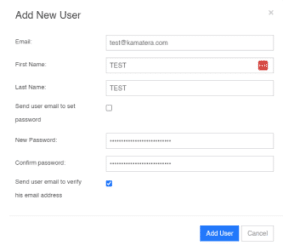
6.Click “add user“.
7.The user can be assigned permissions to servers and the user will be added to the active users list.
Server Management
- Go to: https://console.kamatera.com/login .
- Log in with your email and password.
- On the left side of the screen on the administrative panel, select “My Cloud” > “Servers”.
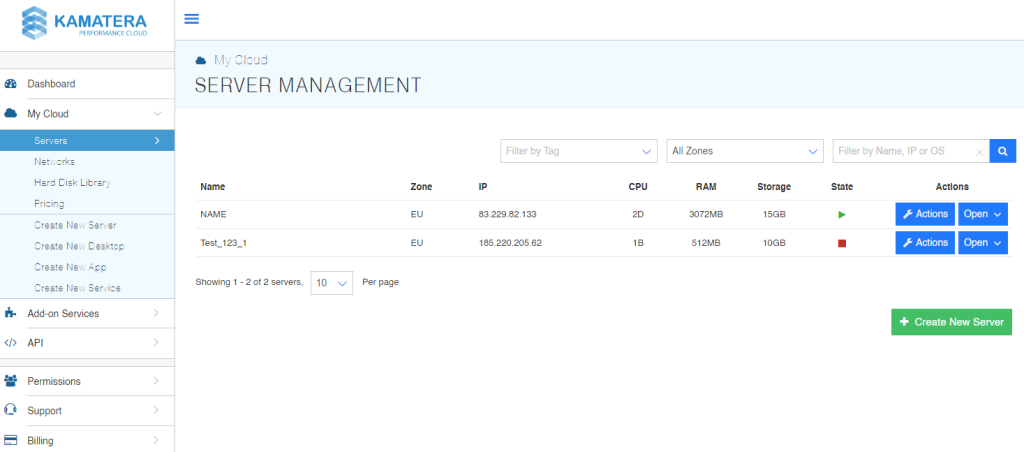
- Select the server you wish to terminate.
- Click “Action“ next to the server you wish to terminate and then “Power Off”.
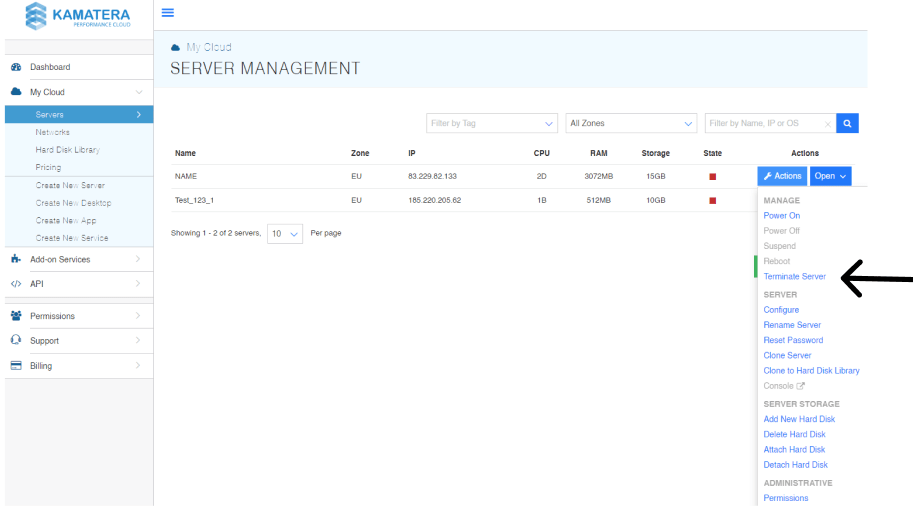
Note that the server MUST be turned off in order to terminate the server.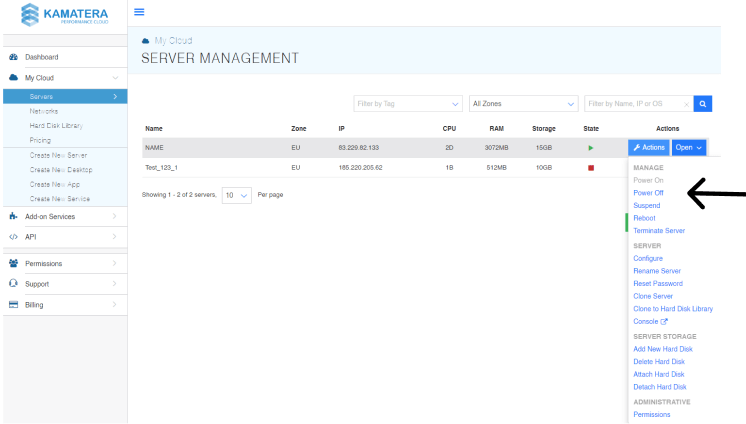
- Click “Action“ next to the server you wish to terminate and then “Terminate Server“.
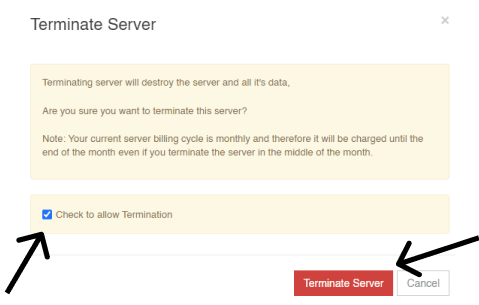
- Check the box to allow termination.
- Click “Terminate Server.“
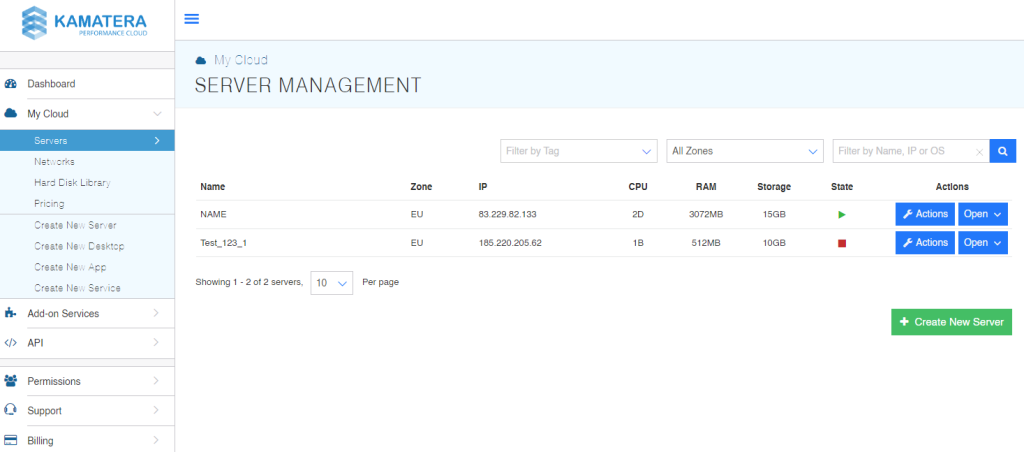
- Go to: https://console.kamatera.com/login .
- Login with your email and password.
- From the administrative panel on the left, navigate to “My Cloud” > “Servers”.
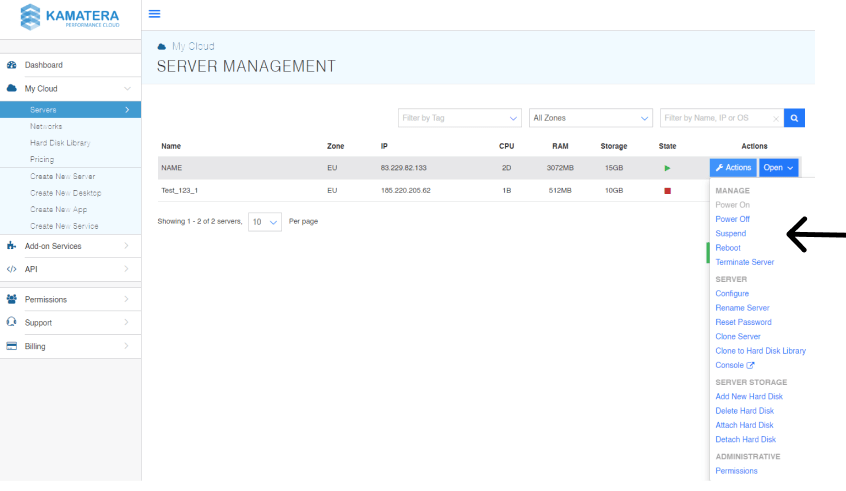
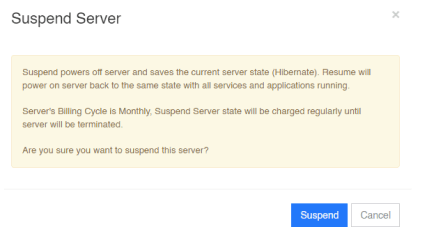
- Click “Action“ > “Suspend“.
- Click “Suspend.“
- Go to: https://console.kamatera.com/login .
- Login with your email and password.
- From the administrative panel on the left, navigate to “My Cloud” > “Servers”.
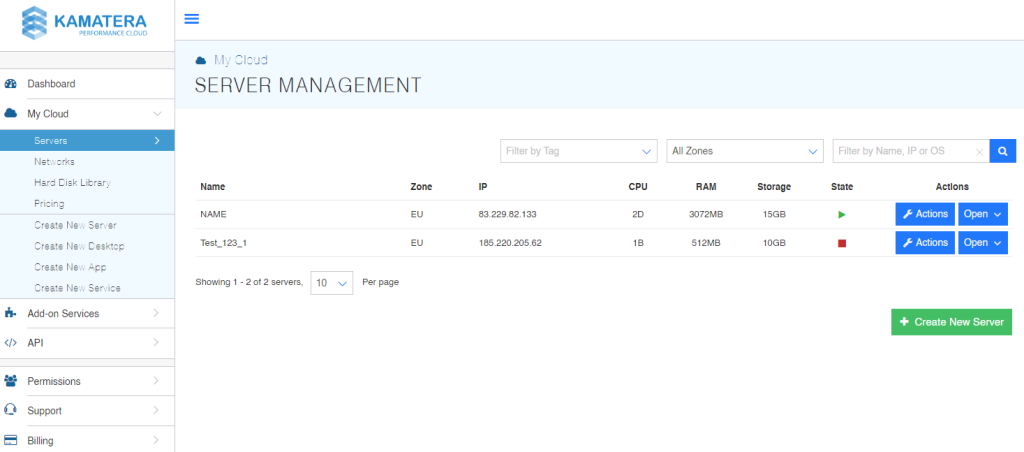
- Find the relevant server and Click “Action”. A drop-down menu will appear. Then click on “Console“ (this will open a new tab).
In the console window, you will see the server specifications and two buttons in the top right corner.

Press ctrl+alt+del which will prompt a warning: Click on Confirm in order to continue. (This is useful for Windows operating systems in order to initiate the login screen.
Disconnect: Manually end the open session. It is recommended that you do it once you have finished working in the console window.
- Copy & Paste will NOT work in the console window.
- If no actions are performed in the console window for a maximum period of 30 minutes, it will terminate the connection automatically.
- Go to: https://console.kamatera.com/login .
- Login with your email and password.
- From the administrative panel on the left side of the screen select “My Cloud” > “Servers”.
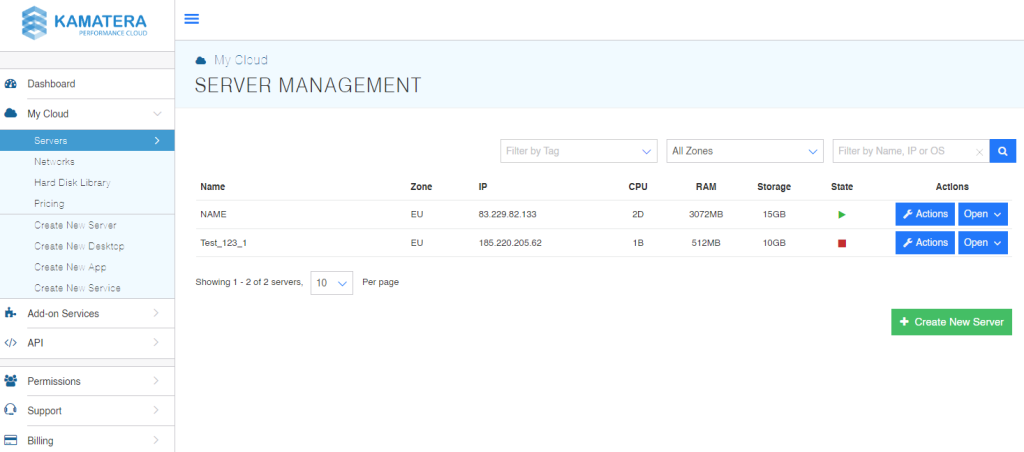
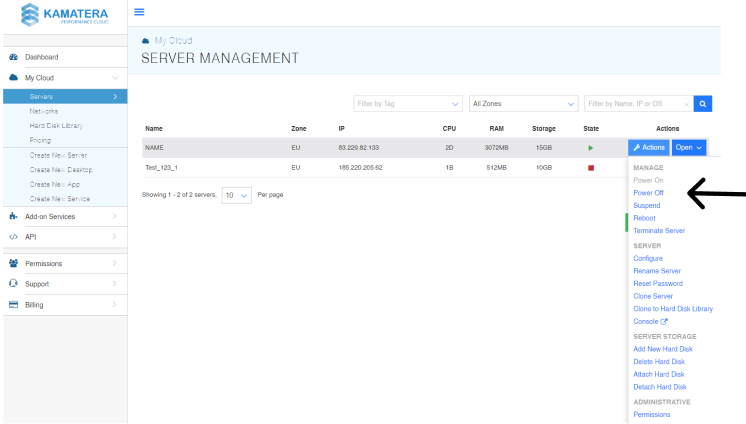
- Select the server you wish to turn off.
- Click “Action“ next to the server you wish to turn on and then “Power Off“.
- Go to: https://console.kamatera.com/login .
- Login with your email and password.
- From the administrative panel on the left side of the screen select “My Cloud” > “Servers”.
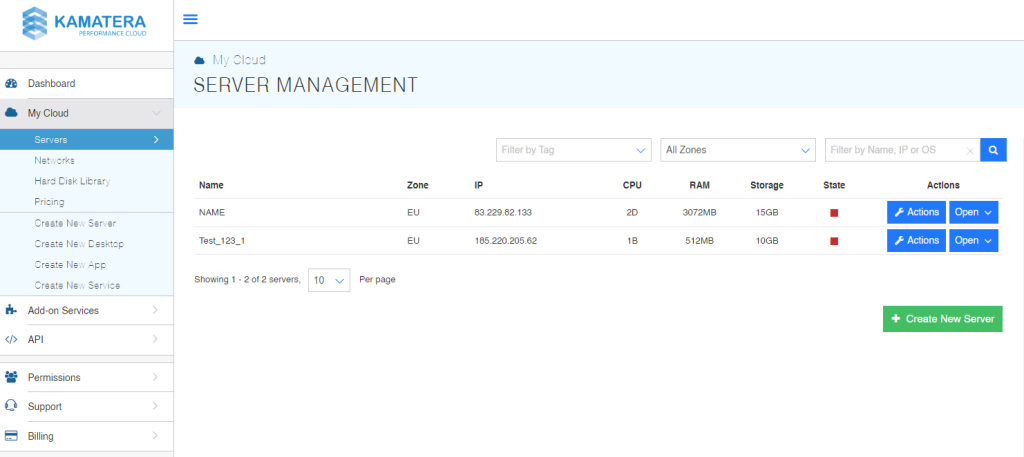
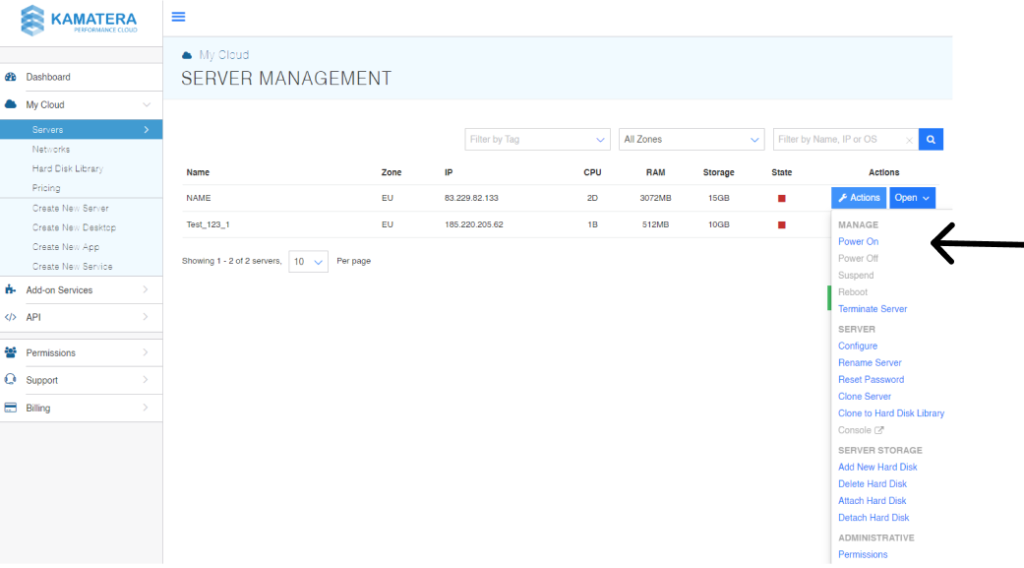
- Click the “Action“ button next to the server you wish to turn on, and then click “Power On“.
- Go to: https://console.kamatera.com/login .
- Log in with your email and password.
- From the administrative panel on the left, navigate to “My Cloud” > “Servers”.
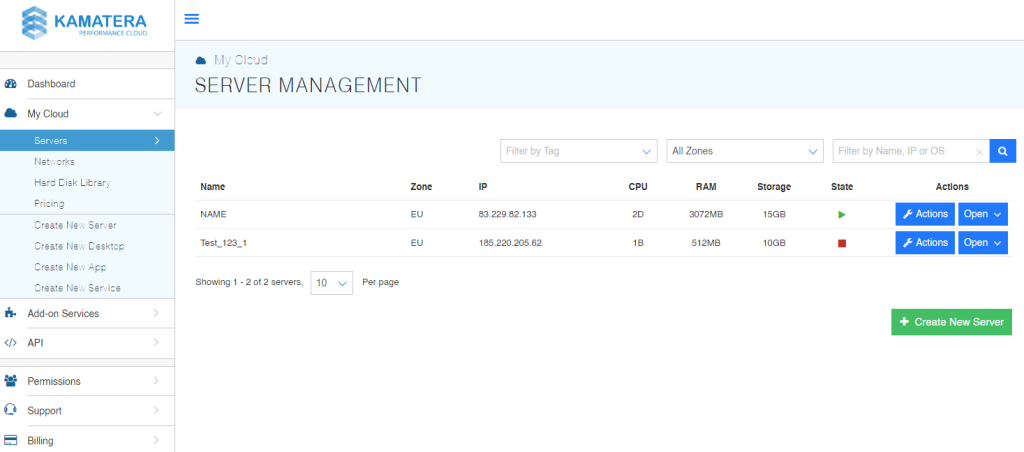
- Once you locate the server, click “Action“ and then “Reset Password“.
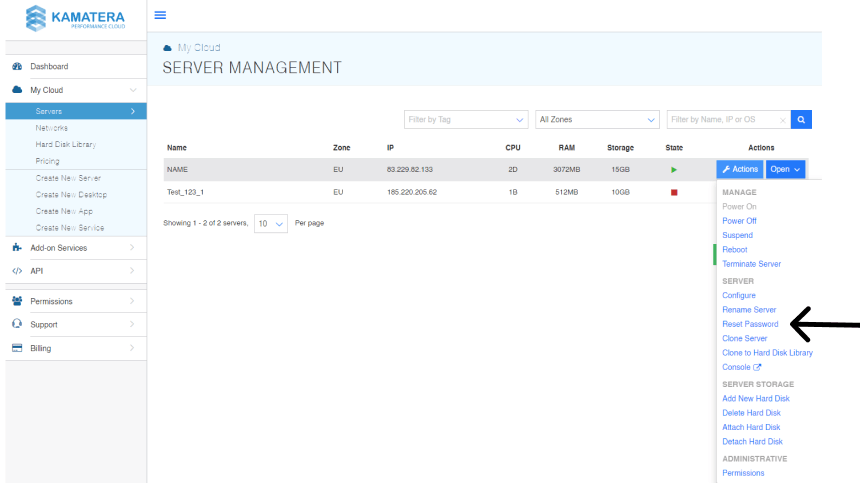
- Type your password in the new password field and again in the Verify password field.
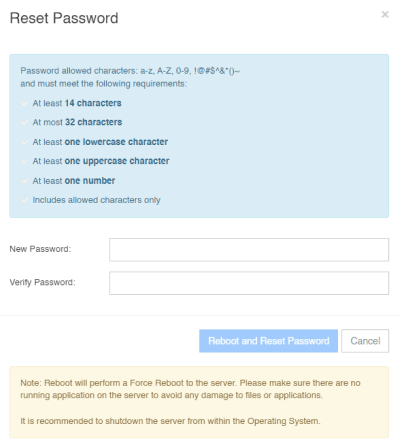
- Click on the Reboot and Reset Password button.
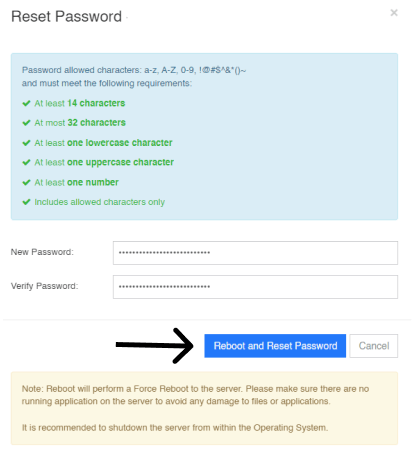
- Wait until the process is complete.
Password rules:
- At least 14 characters
- At most 32 characters
- At least one lowercase character
- At least one uppercase character
- At least one number
- Includes allowed characters only (a-z, A-Z, 0-9, !@#$^&*()~ )
Note: Reboot will perform a Force Reboot to the server.
Please make sure there are no running applications on the server to avoid any damage to files or applications.
It is recommended to shut down the server from within the Operating System.
- Go to: https://console.kamatera.com/login .
- Login with your email and password.
- From the administrative panel on the left, navigate to “My Cloud” > “Servers”.
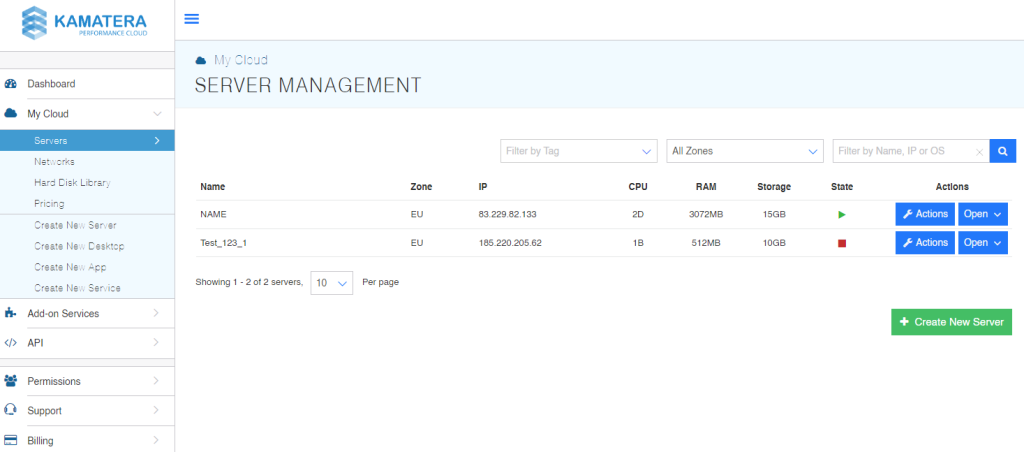
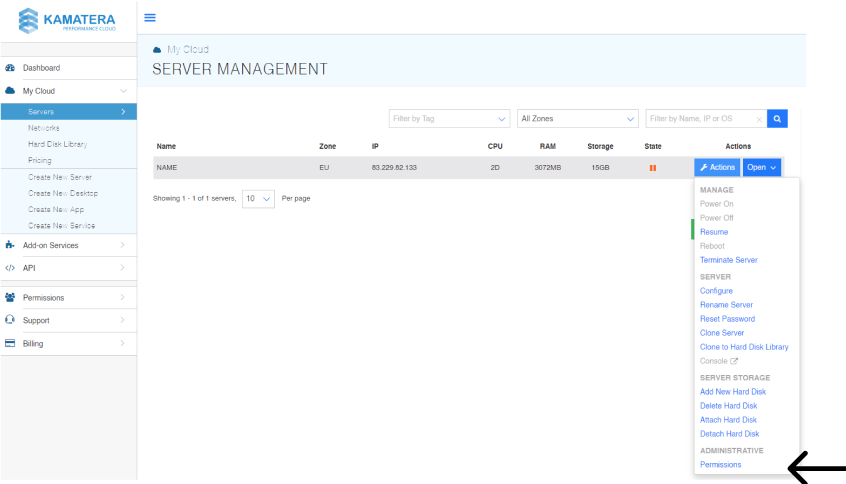
- Click “Action“ > “Permissions“.
- Enter user email and click “Assign User/Group“.
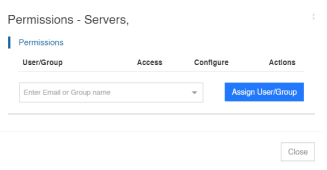
- Check/ uncheck permission to access and configure according to the desired permissions.
- To remove user, click “Remove“.
- Go to: https://console.kamatera.com/login .
- Login with your email and password.
- From the administrative panel on the left, navigate to “My Cloud” > “Servers”.
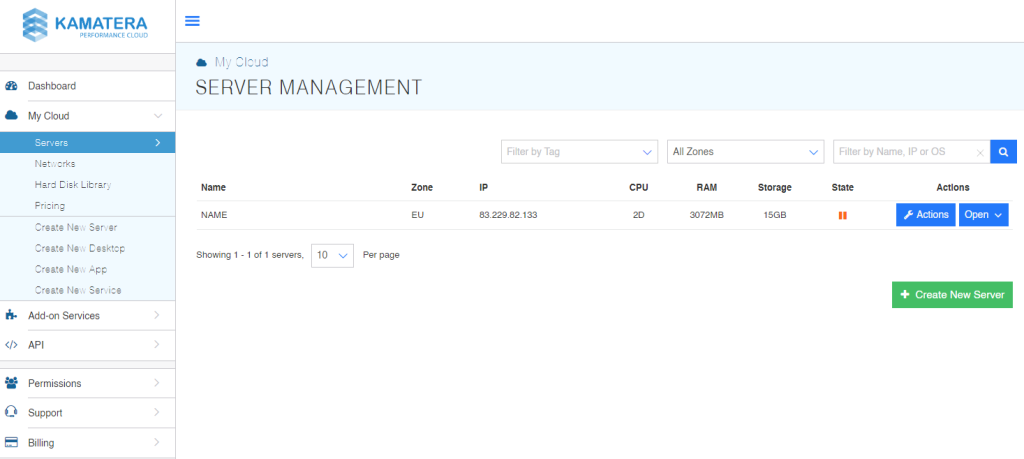
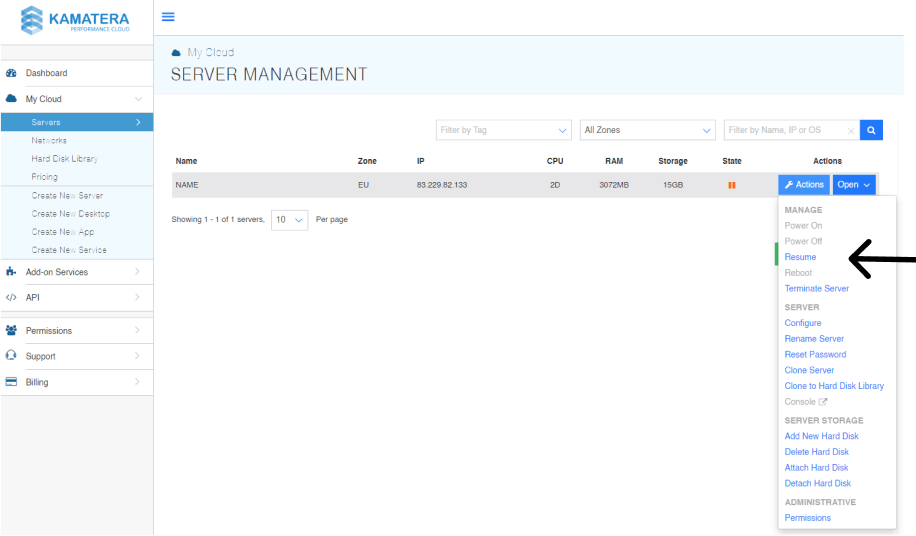
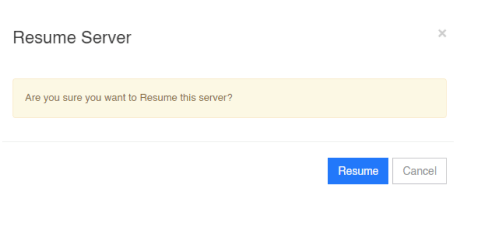
- Click “Action“ > “Resume“.
- Click “Resume“.
- Go to: https://console.kamatera.com/login .
- Login with your email and password.
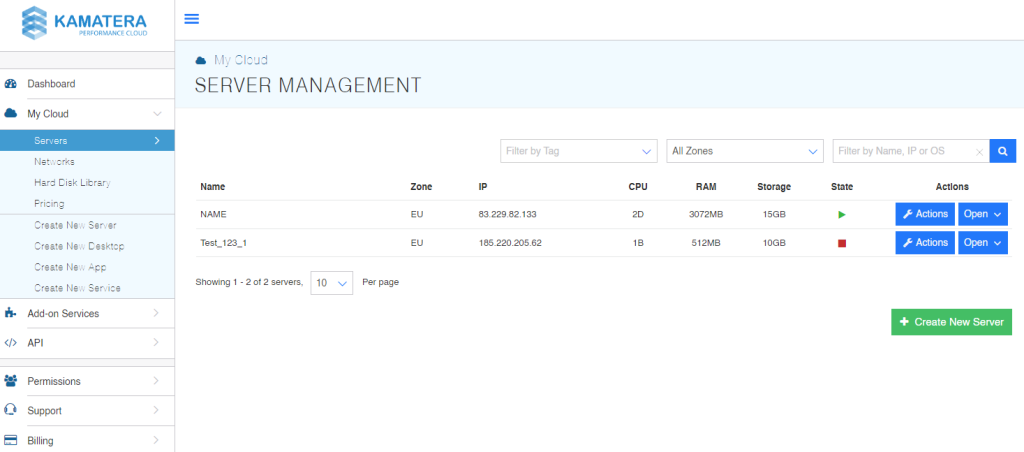
- From the administrative panel on the left, navigate to “My Cloud” > “Servers”.
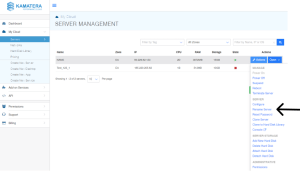
- Click “Actions” > “Rename Server.“
- Write the new name in the field “New Name“.
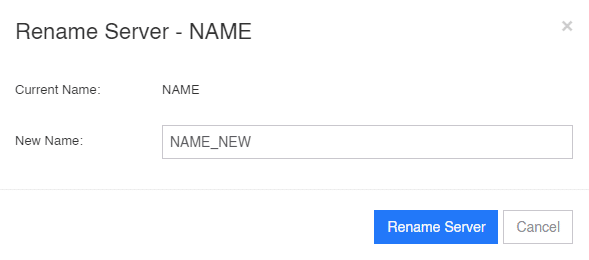
- Click “Rename Server“
The renaming process does not reboot the server. Other operations in the console on that server will not be available until the process is complete.
NOTE: Before you begin, you MUST NOT clone a server that is in a domain – It may cause issues to your environment.
- Go to: https://console.kamatera.com/login .
- Login with your email and password.
- From the administrative panel on the left, navigate to “My Cloud” > “Servers”.
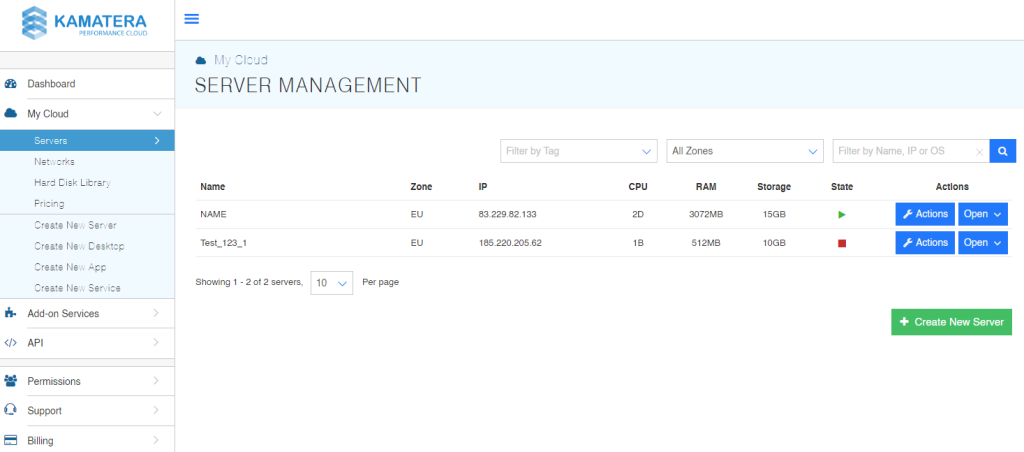
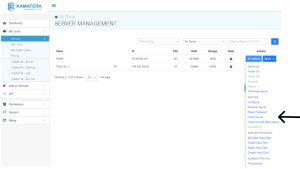
- Click “Action“ > “Clone Server“.
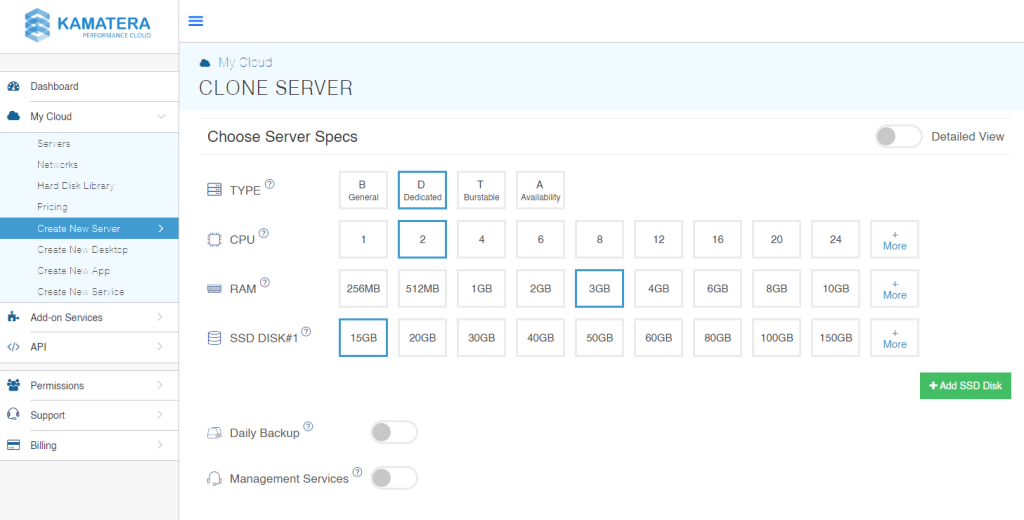
- Select the appropriate server specifications.
- Networking section- it is recommended that you choose the default settings

- Finalize Settings- enter your password and set the server name and amount. Choose whether to turn the server/s on.

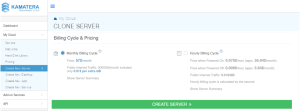
- Choose billing cycle and click “Create Server”.
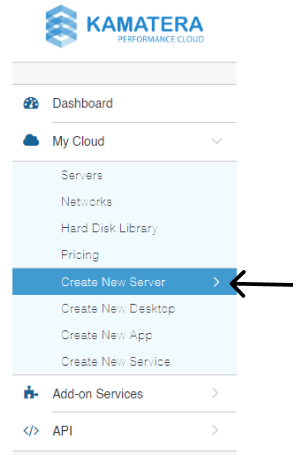
From the administrative panel on the left, navigate to “My Cloud” > “Create New Server”.
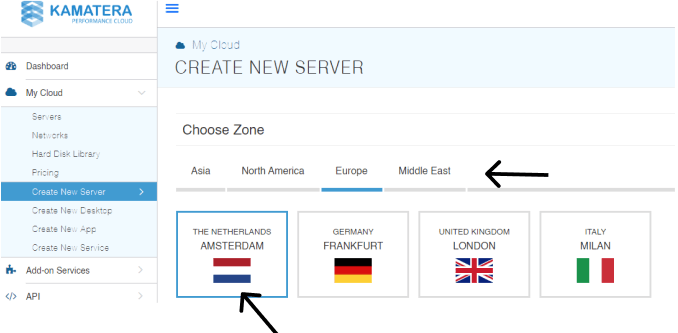
- Select a region and datacenter location.
- Choose an OS or application/service image and version to be installed.
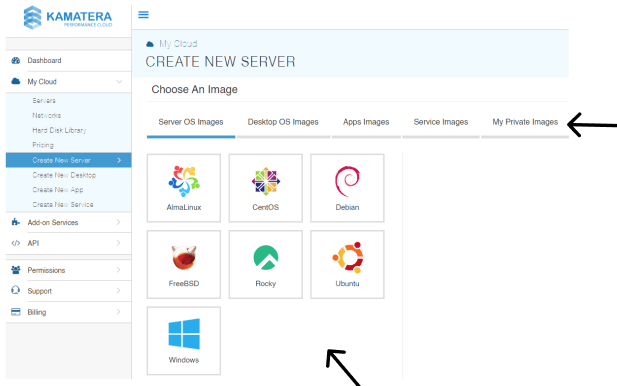
- Choose version.
- Choose the CPU type and server hardware specs.
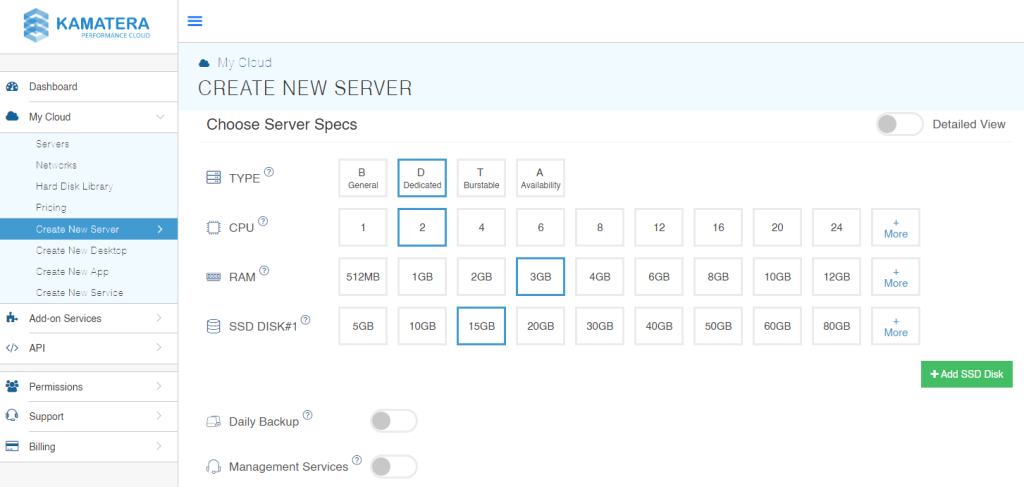
- Enable Daily Backup for a complete 14-day backup. This is a separate charge. Full details can be found on our pricing page.
- Toggle on Management Services to receive a dedicated account manager. This is also a separate charge monthly. More details can be found on our pricing page.
- Configure the networking (or leave as default).

- Set a password and name for the server (This will be used for things like SSH and RDP logins).

- Select a billing type (Hourly or Monthly).
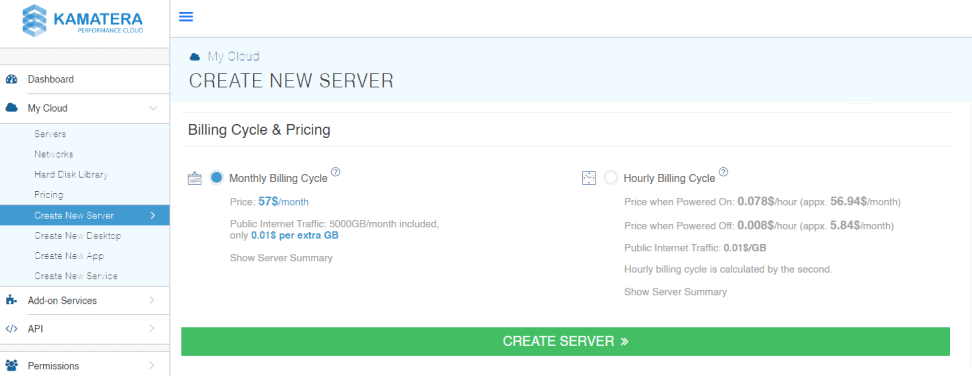
- Select “Create Server”.
- Server setup progress can be seen within the “Tasks Queue” window.
You can add multiple WANs or VLANs to a single server for your various networking needs.
- Go to: https://console.kamatera.com/login .
- Log in with your email and password.
- Go to the “My Cloud” menu and select the “Servers” tab.
- Select the server you wish to add a VLAN to.
- Click “Open” under that server and select “Networks”.
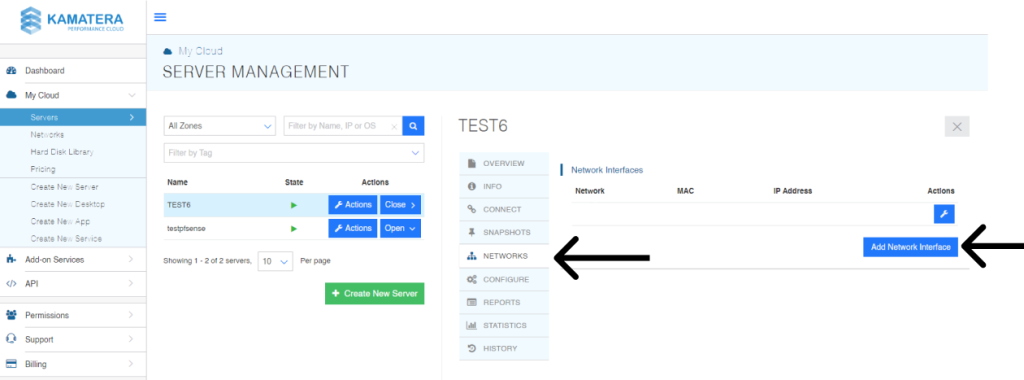
- Click “Add Network Interface” and select “Create New VLAN” as the Network.
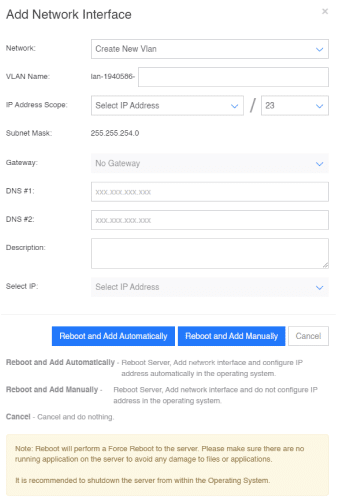
- Fill out the required information.
- Click “Reboot and Add”.
